Continental Learning
Introduction
Continental learning task can receive new training data after model training, and update ML model to improve performance in new data and loose as least performance on old data as possible. Unlike simply re-training a brand-new model with all data, our platform is based on Continental machine learning technology, which meant to address problems caused by data changes such as concept drift , catastrophic forgetting, out of distribution, etc. without any coding and users’ machine learning expertise as well.
How to use?
Prepare Data
Currently we support the input of data files in csv format, with comma separator and header.
Meanwhile, as continental learning tasks needs to distinguish new data and old data, so every data records should include a temporal attribute to describe the timeliness of the data. Examples of such formats include: "2023/6/1 0:15", "2024-12-31 00:00:05", etc.
In other version such as private deployment, there are various data input forms, which can be combined with our special data storage to enhance throughput performance. More data forms will be available in future releases.
Task Configuration
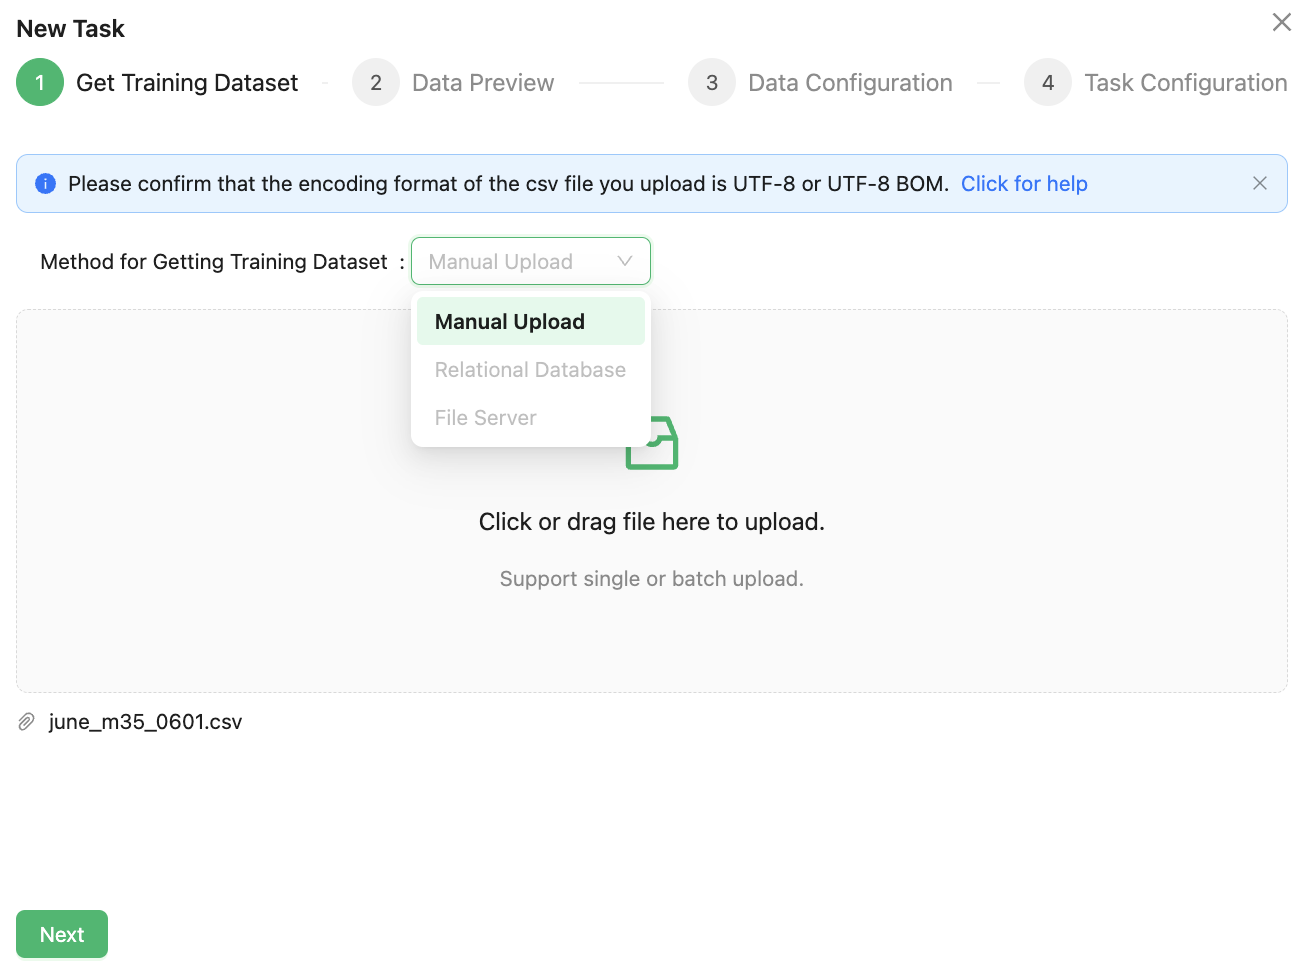
After logging in to the platform, click the New Continual Learning button on the upper right of the page, and the New Task dialog box will pop up.
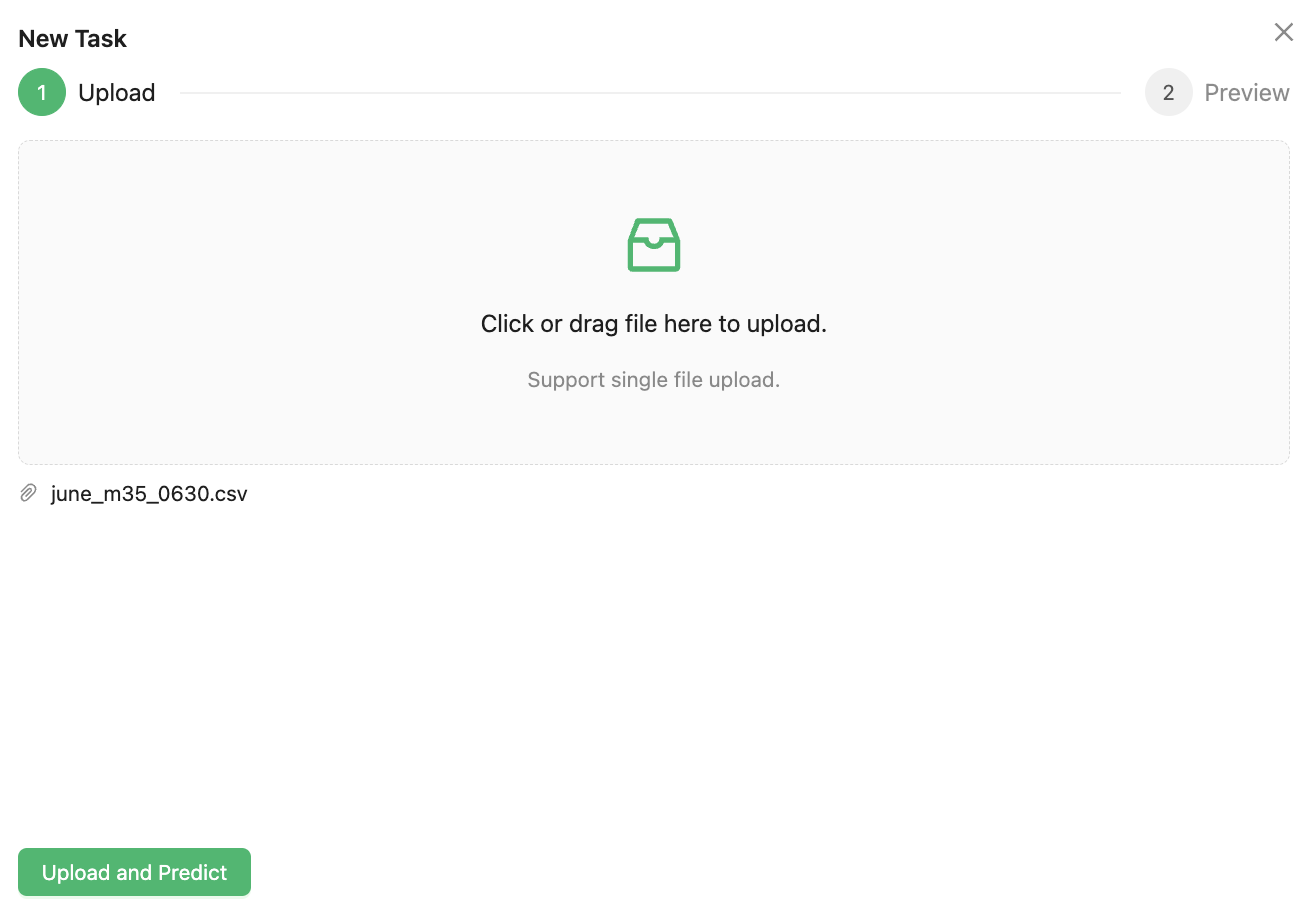
When the "Manual Upload" option is selected from the dropdown menu for “Method for Getting Training Dataset”, users only need to drag and drop the dataset into the file dialog box and then click "Next to complete the file upload.
Currently, the only supported method for acquiring the training dataset is "Manual Upload". In other version such as private deployment, additional methods for obtaining the training dataset will be supported, including "File Server", "Relational Database", etc.
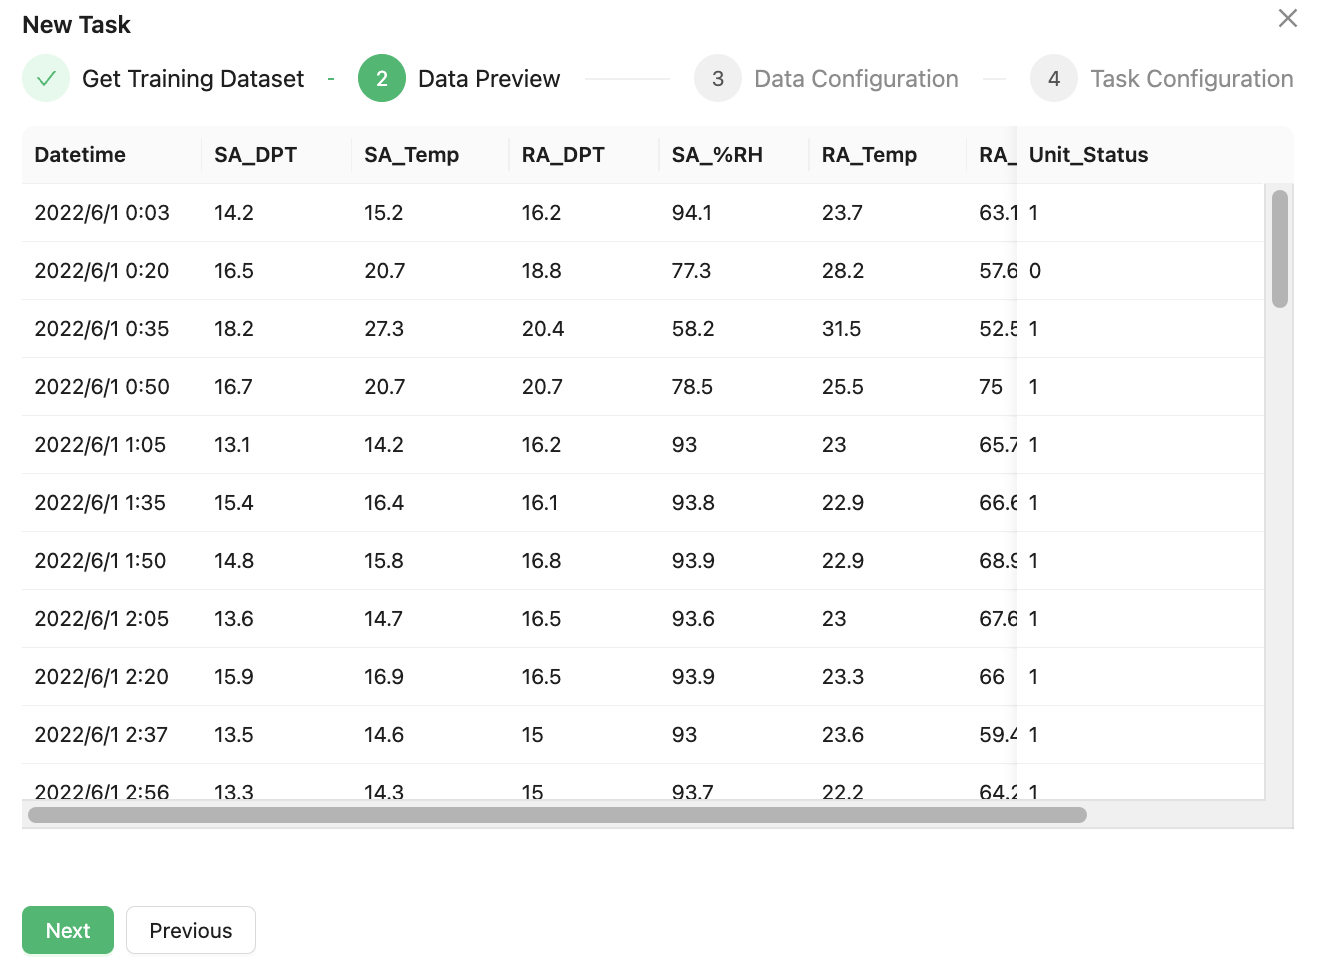
Click Next to preview the uploaded data.
Continue to click Next, and the platform will automatically parse the type of each field in the file. The user needs to confirm the following information:
⊖ Confirm the fields need to predict, and select “Label” from the corresponding field drop-down list. The default is “Feature”.
⊖ Confirm the fields that are not needed in the data set, and select “Ignore” from the corresponding field drop-down list.
⊖ Confirm the non-numeric category feature fields in the fields , and set the “is Categorical” switch to enable.

It is important to note that, unlike AutoML task , continental learning tasks require the configuration of a "TimeIndex" or "GroupIndex" to mark the fields in the dataset that have temporal attributes.
For example, if the time field in the dataset is named "Datetime," you should select this field as the "TimeIndex" and then click the "Configuration" button to complete the time field configuration.

Please note that the time-series field selection by your serves solely as an indicator of data recency, and accordingly, it will deactivate time-series algorithms while bypassing related configuration options for temporal fields. If you require activation of time-series analytical capabilities, mandatory configuration of temporal field parameters must be implemented to ensure proper chronological processing functionality.

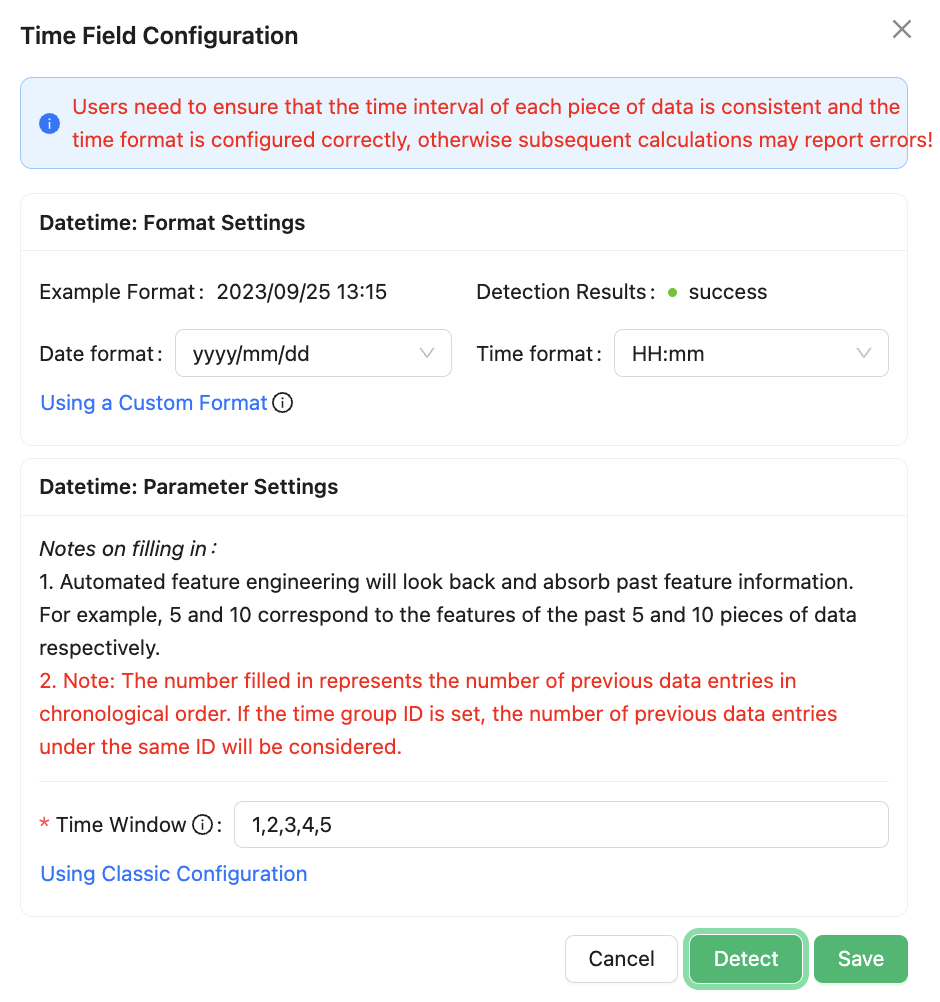
In the "Time Field Configuration" dialog box, the primary configurations include setting the Format Settings and Parameter Settings for the time field.
⊖ Format Settings: Used to define the specific format of the time field in the dataset. For example, if the "Datetime" field has the format "2022/6/1 0:20," you need to select the appropriate options that match your data format. In this case, choose the "Date format" as "yyyy/MM/dd" and the "Time format" as "HH:mm".
⊖ Parameter Settings: Since automated feature engineering will look back at historical feature information based on this configuration, it is necessary to configure the "Time Window" according to the actual needs and business scenarios of the current task.
After completing the configuration, you can click the "Detect" button to perform an automatic detection. When the "Detection Results" shows "success", the time field configuration is complete.
Click Next to set the task name, number of AutoFE attempts, AutoML attempt time budget, remarks and other information, and then click Confirm to complete the task creation.
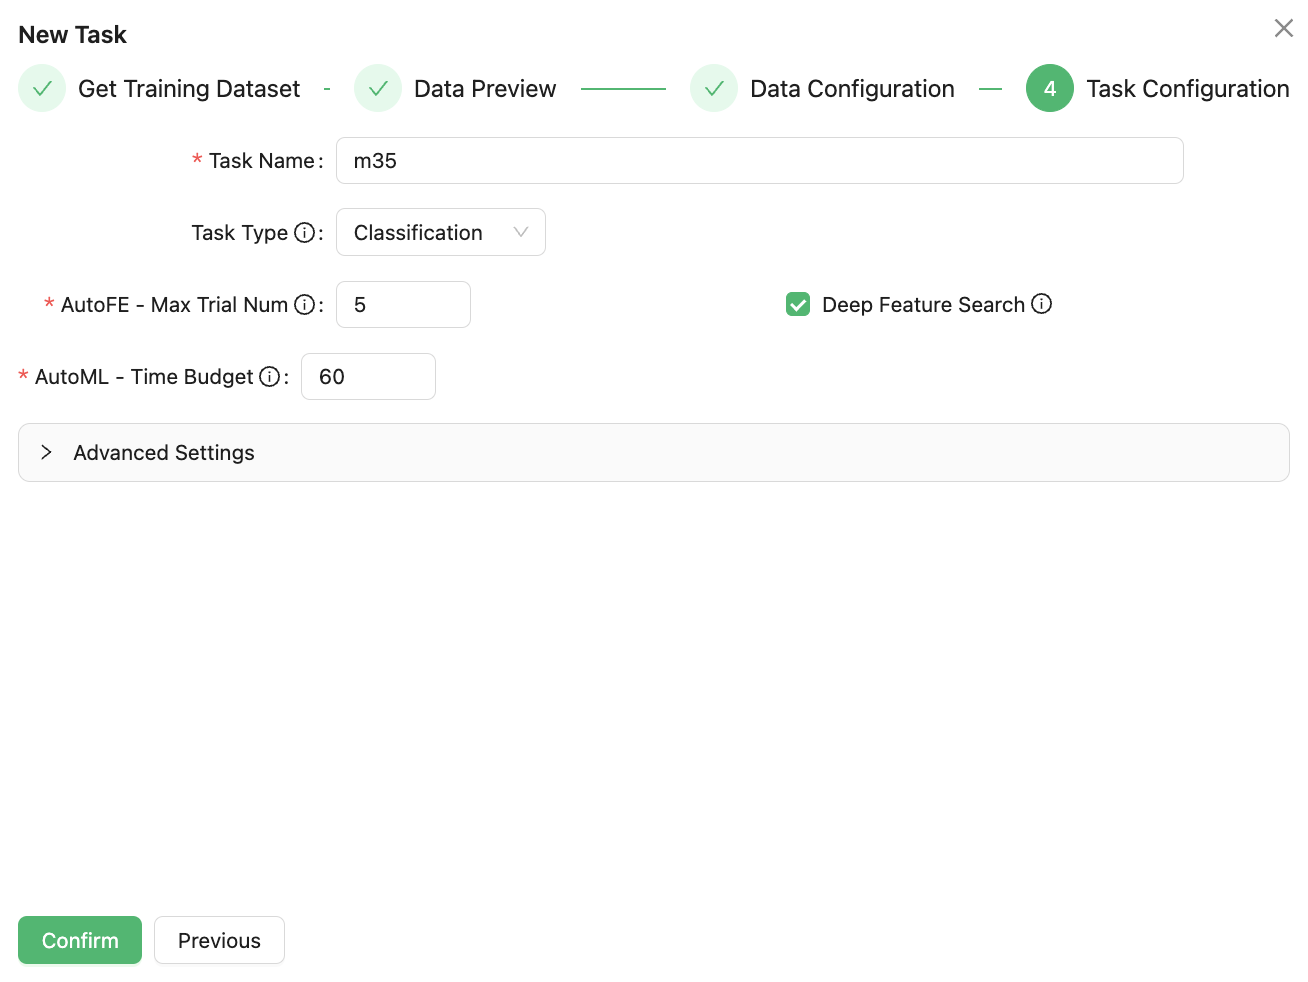
Task Type drop-down option provides a choice of two machine learning task types: classification and regression. If the label is a category feature, it is a classification problem; If the label is numeric then it is a regression problem. In this case, select classification.
After completing the task configuration, you can view the created task in the "Automated Continual Learning" list.

Model Training
Select the created task in the Train Task list and click Run to confirm it. The whole modeling process is fully automated.

If the task status is "Updating", the training task is running.

Upon completion of the current batch run, the best accuracy achieved during this model training will be displayed. The best accuracy attained in this training is approximately 0.99.

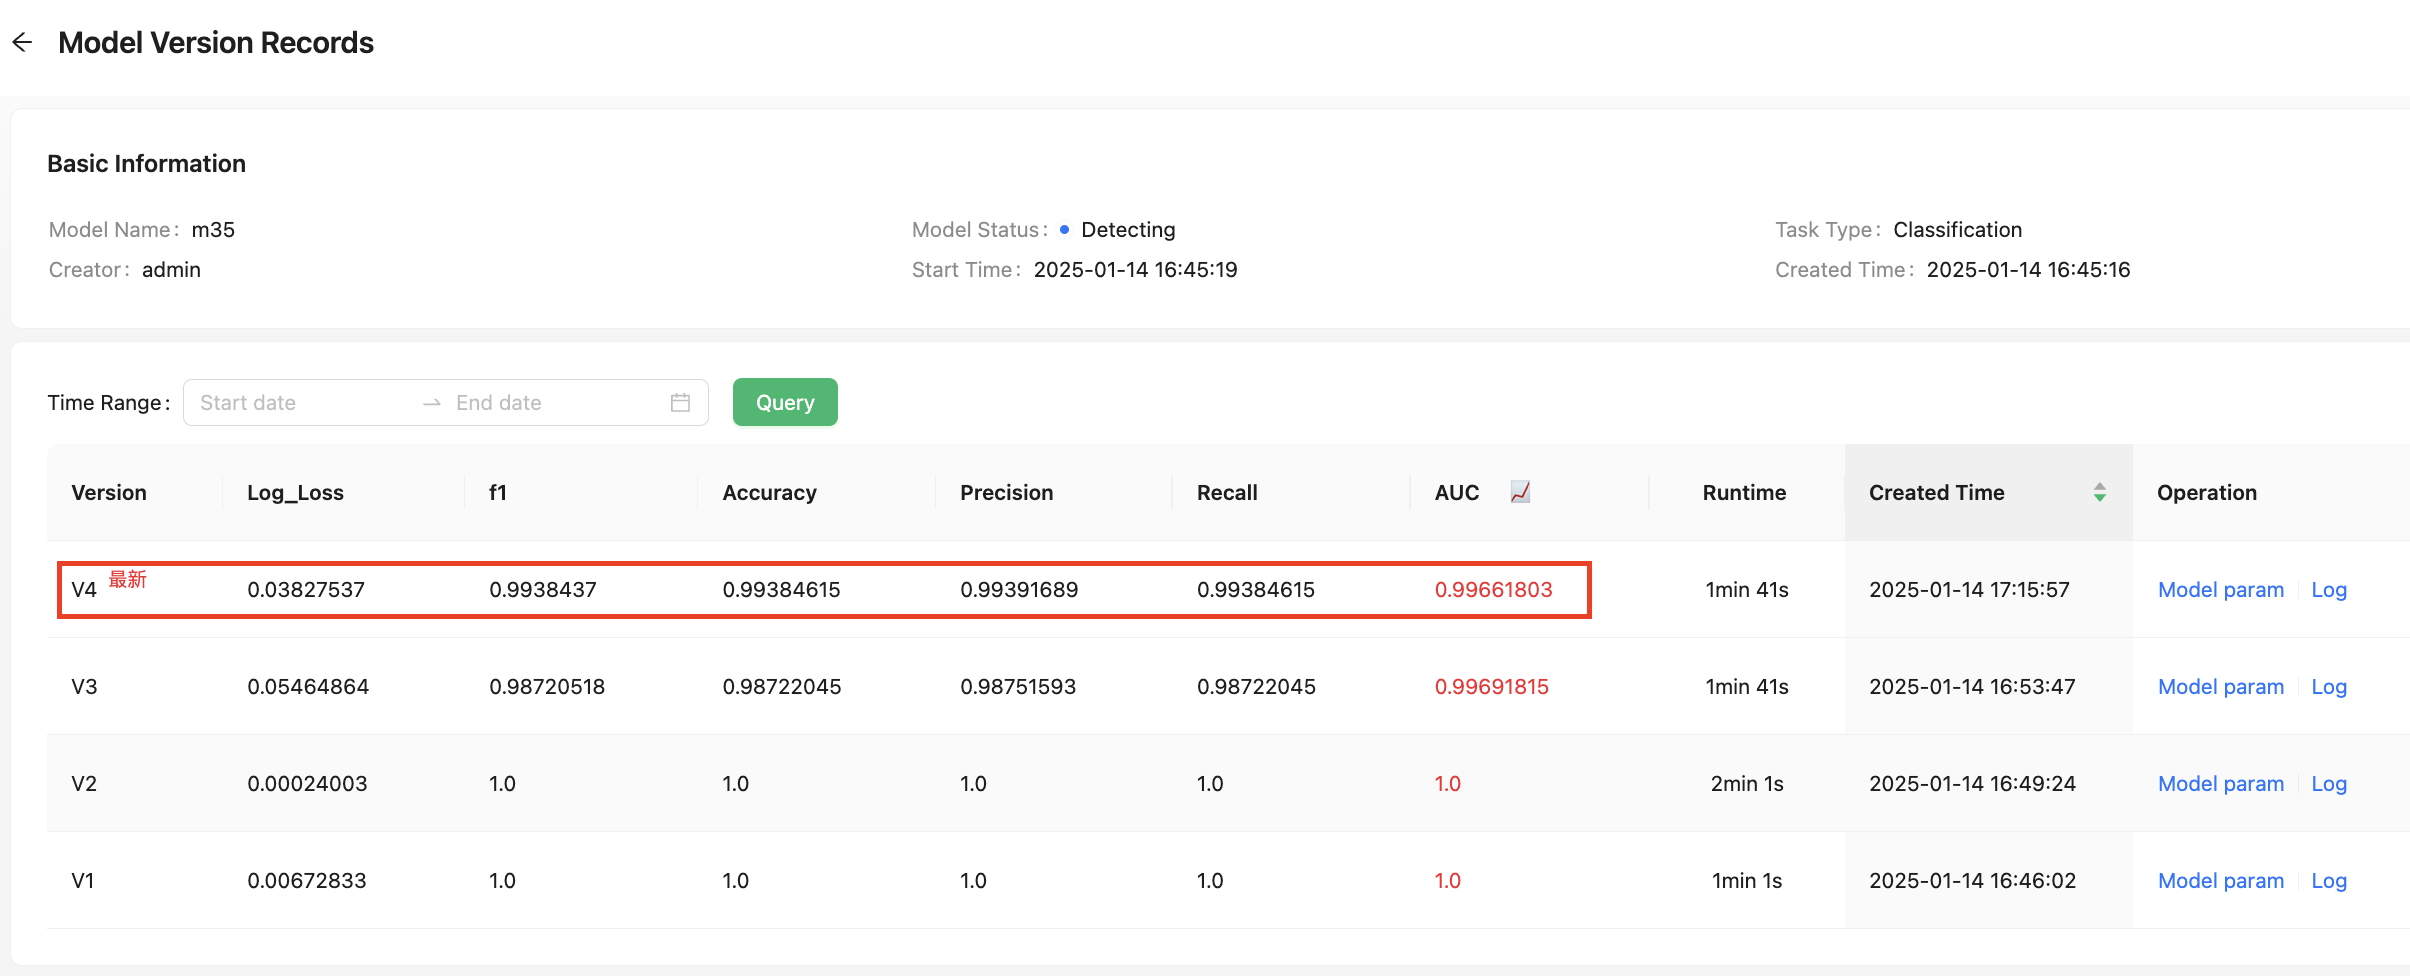
It is important to note that, unlike automated machine learning tasks, continuous learning tasks will run continuously. Whenever new data is detected, a new round of model training will be triggered based on the previous training results. Each trigger of a new round of model training will generate a new model version. If no new data arrives, the system will wait for new data to arrive before triggering another round of model training.
When the task status is "Detecting", it indicates that the previous round of model training has been completed and the system is now waiting for new data to arrive. Users can click the "Append" button to continue uploading datasets. By doing so, new data. After appending the dataset, click the "confirm upload" button to wait for the trigger of a new model training session.

Over time, the model may detect new data at different points in time, resulting in the generation of various historical versions. Users can click on "Versions" to view details of each model version.

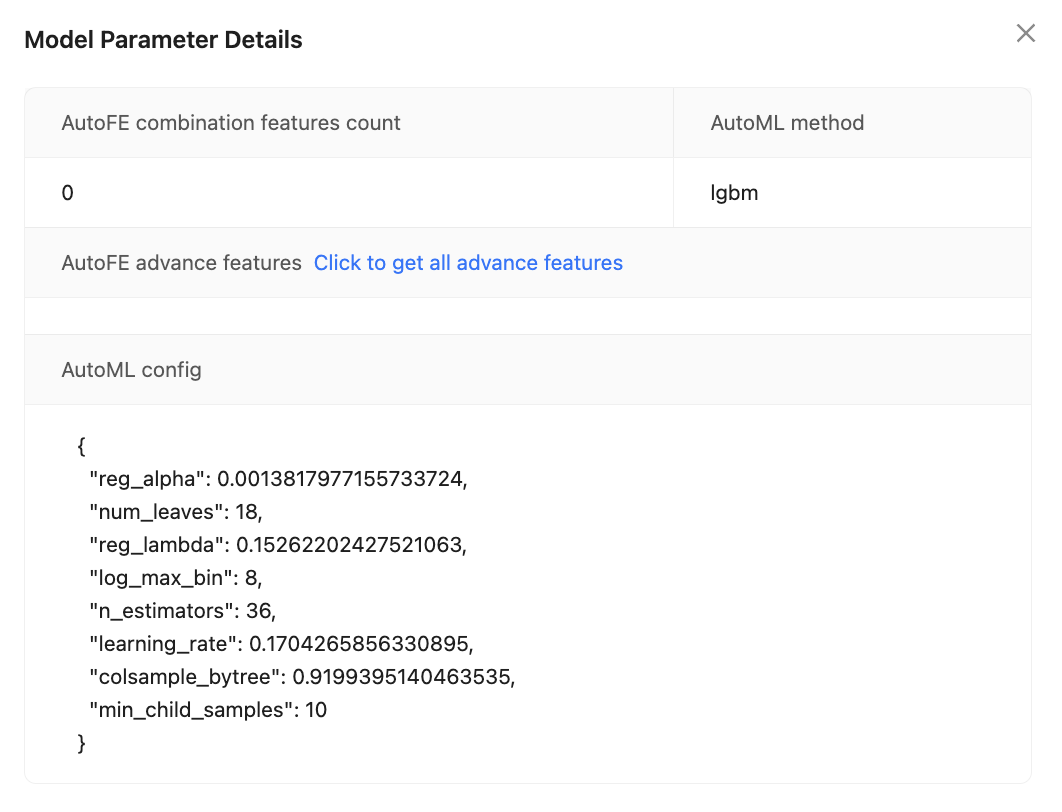
In the model version details, users can view the historical records of each triggered model training session. This includes information such as the model version number, the time the model was triggered, evaluation metrics, and training duration. You can click on "Model param" for a specific model version to see more detailed information about that historical version.
Model Information
You can click on "More" and then select "Model param" to see detailed information about the latest model version.
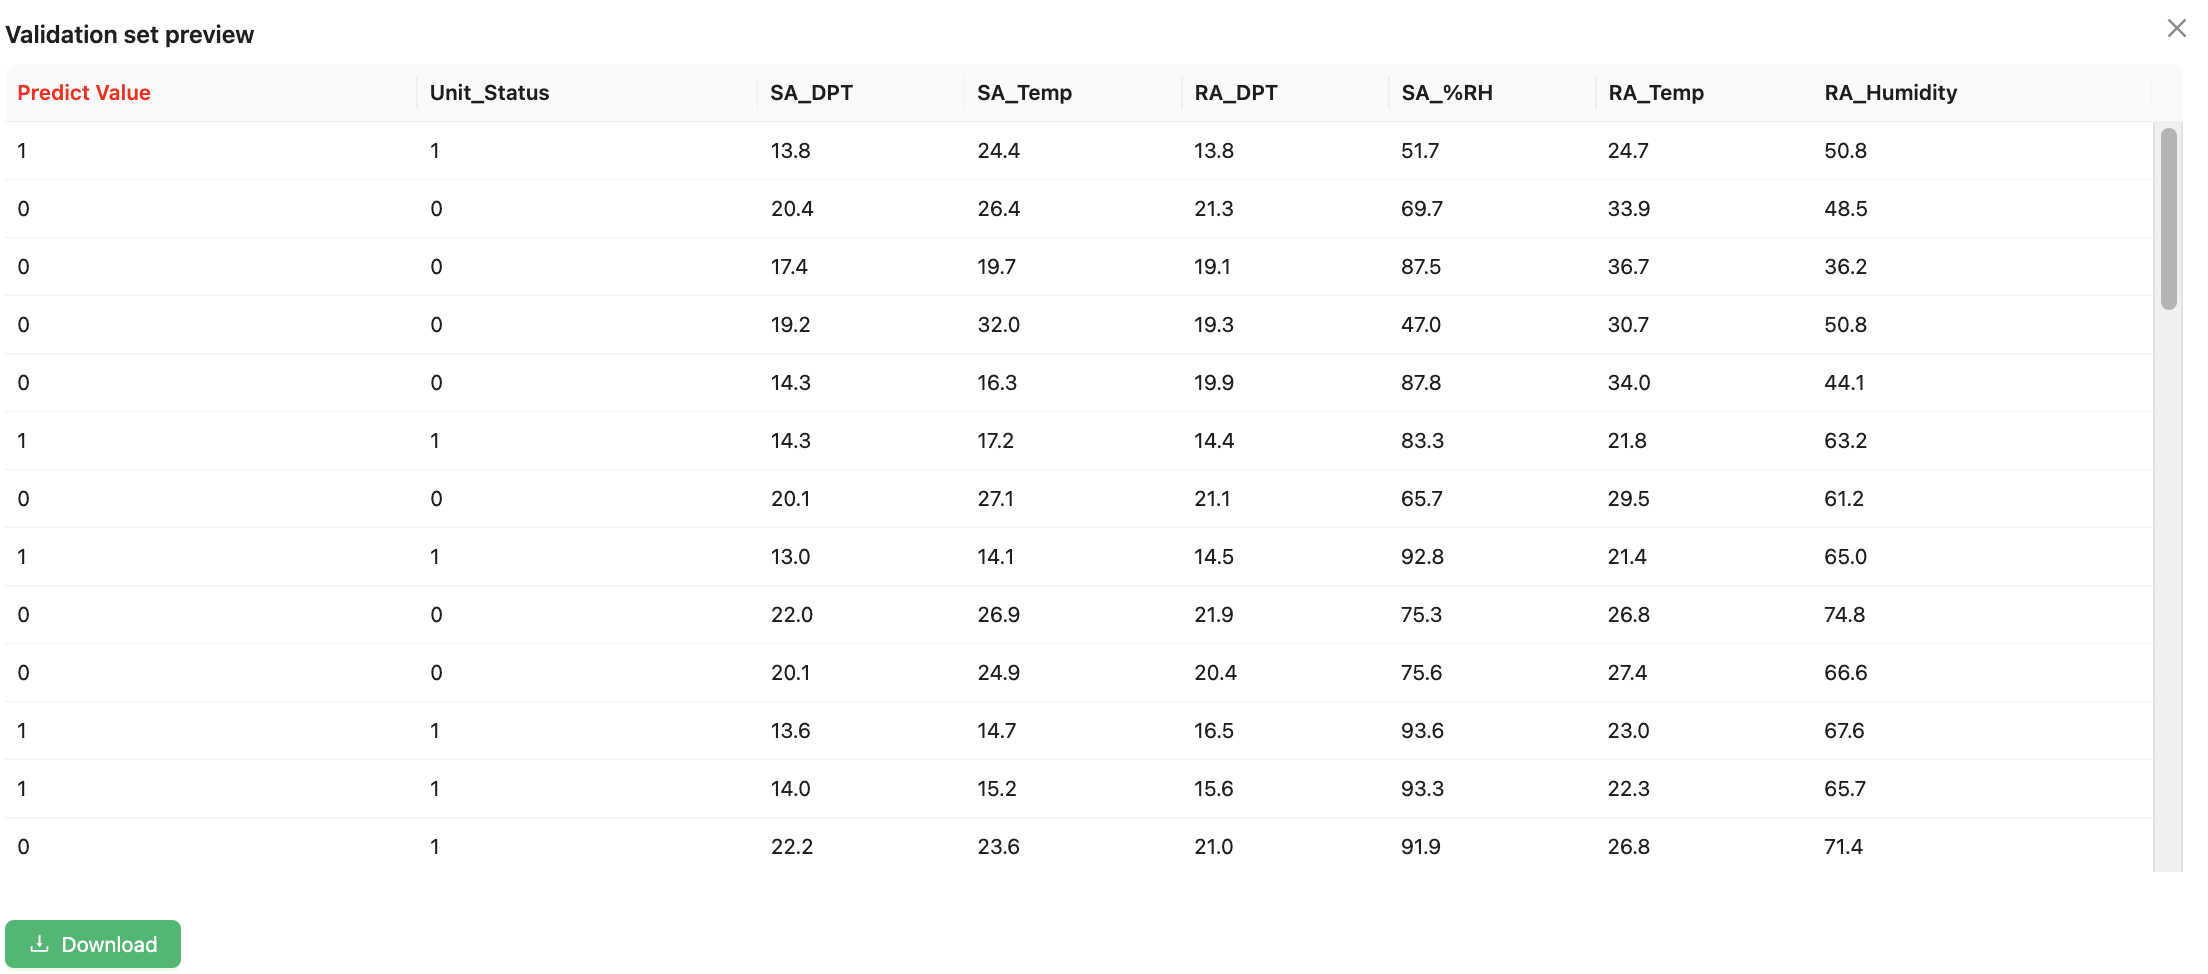
You can click Validation set to see validation set predictions.
Model Prediction
Select the corresponding task in the Train Task list and click Predict to make model prediction. You can upload predict data to the platform, and the requirements are the same as the requirements for data files in the Prepare Data section. The predict data don’t need to have the label column.
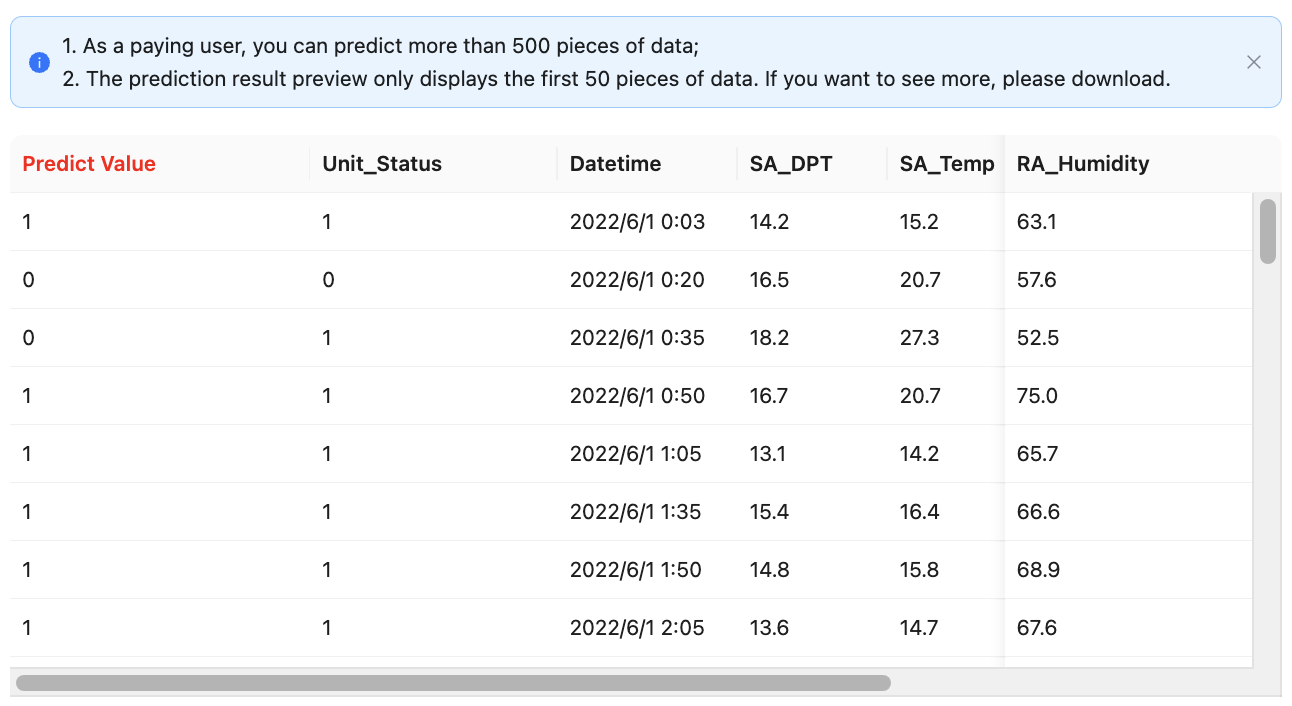
Click Upload and predict, wait a moment, and the data shown in Preview is the result predicted by the trained model.
The "Predict Value" column highlighted in red lists the results predicted by the model, and provides a download function to download the prediction results locally.