Model Online
Model online is a universal service capability provided for model prediction, which has the following characteristics:
(1)Provide data source management and other related configuration, support from heterogeneous object storage continuous access to data files for model prediction.
(2)Model prediction supports batch-based incremental prediction, which enables simultaneous prediction of multiple data files within a batch.
(3)Model prediction results can be saved end-to-end to heterogeneous object storage.
(4)Support forecast record view, provide more detailed information for each forecast, and support the preview and download of initial data and forecast result data.
Online
When the model is trained and Task Status is "SUCCESS", click Model Online to predict the data sustainably.
Step 1 : Select the successful model and click Model Online, as shown below:

Step 2 : Fill in the relevant parameters involved in launching the model, as shown in the figure below:
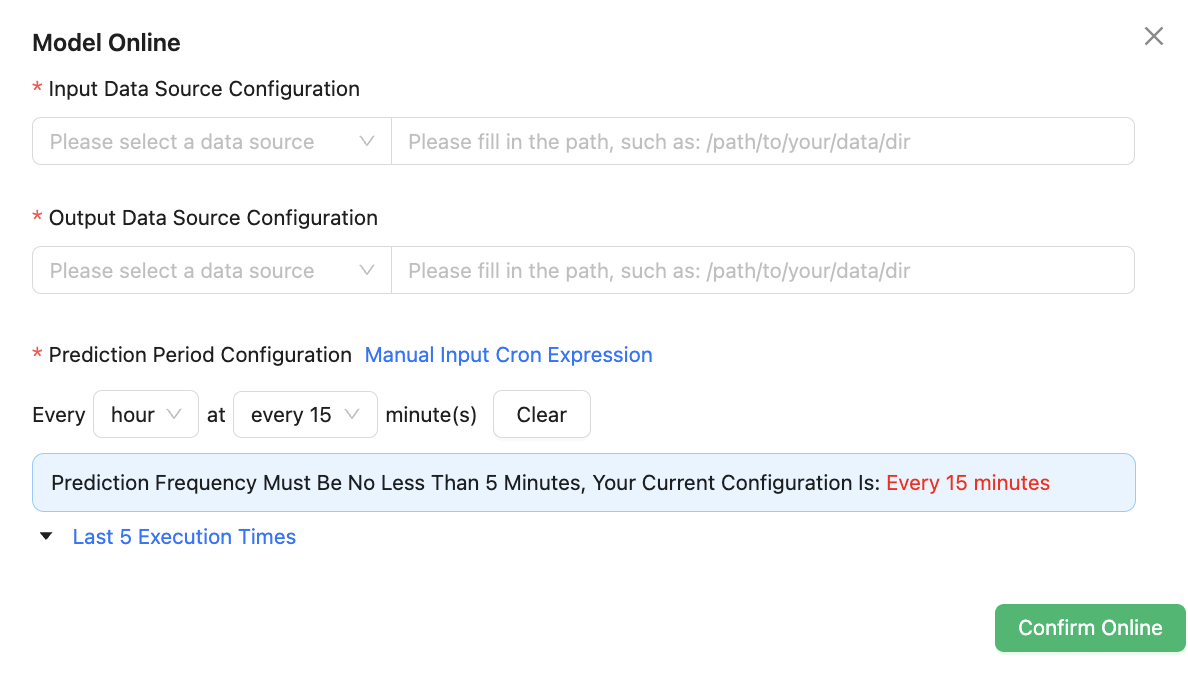
Input/Output Data source Configuration need to configure the data source name and data directory corresponding to the data source.
There are built-in SFTP data sources that can be used directly in the system. If you want to use a custom data source, you can go to Data Source Management page to create one. For details, see section "Add Data Source" in "Data Source Management".
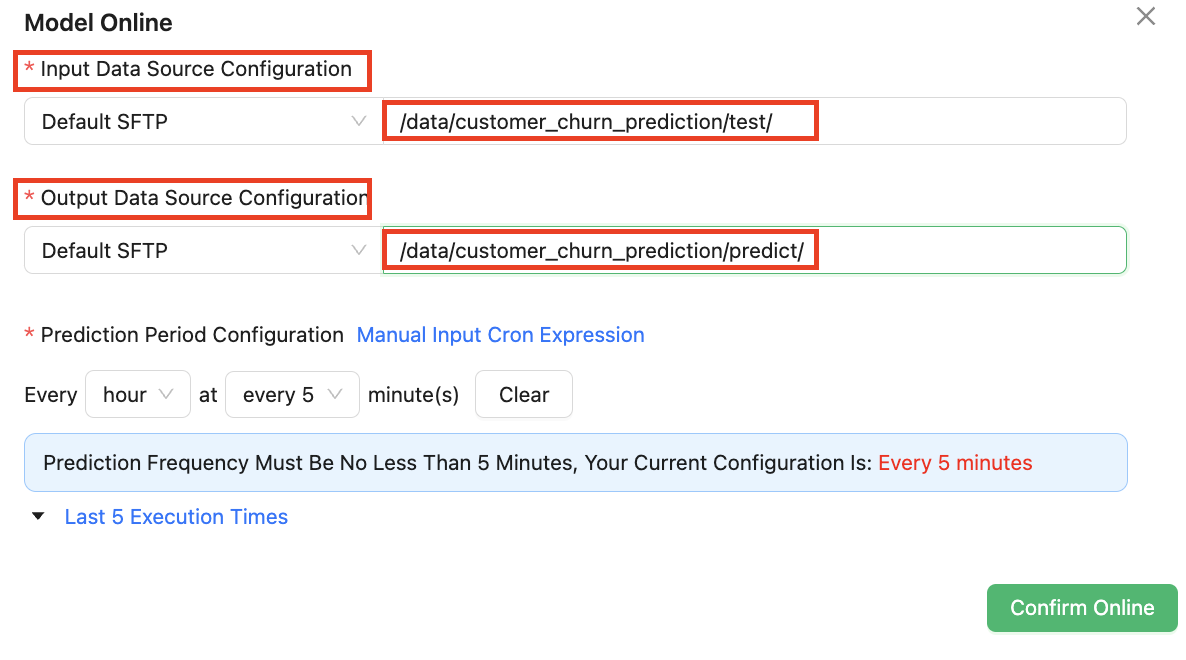
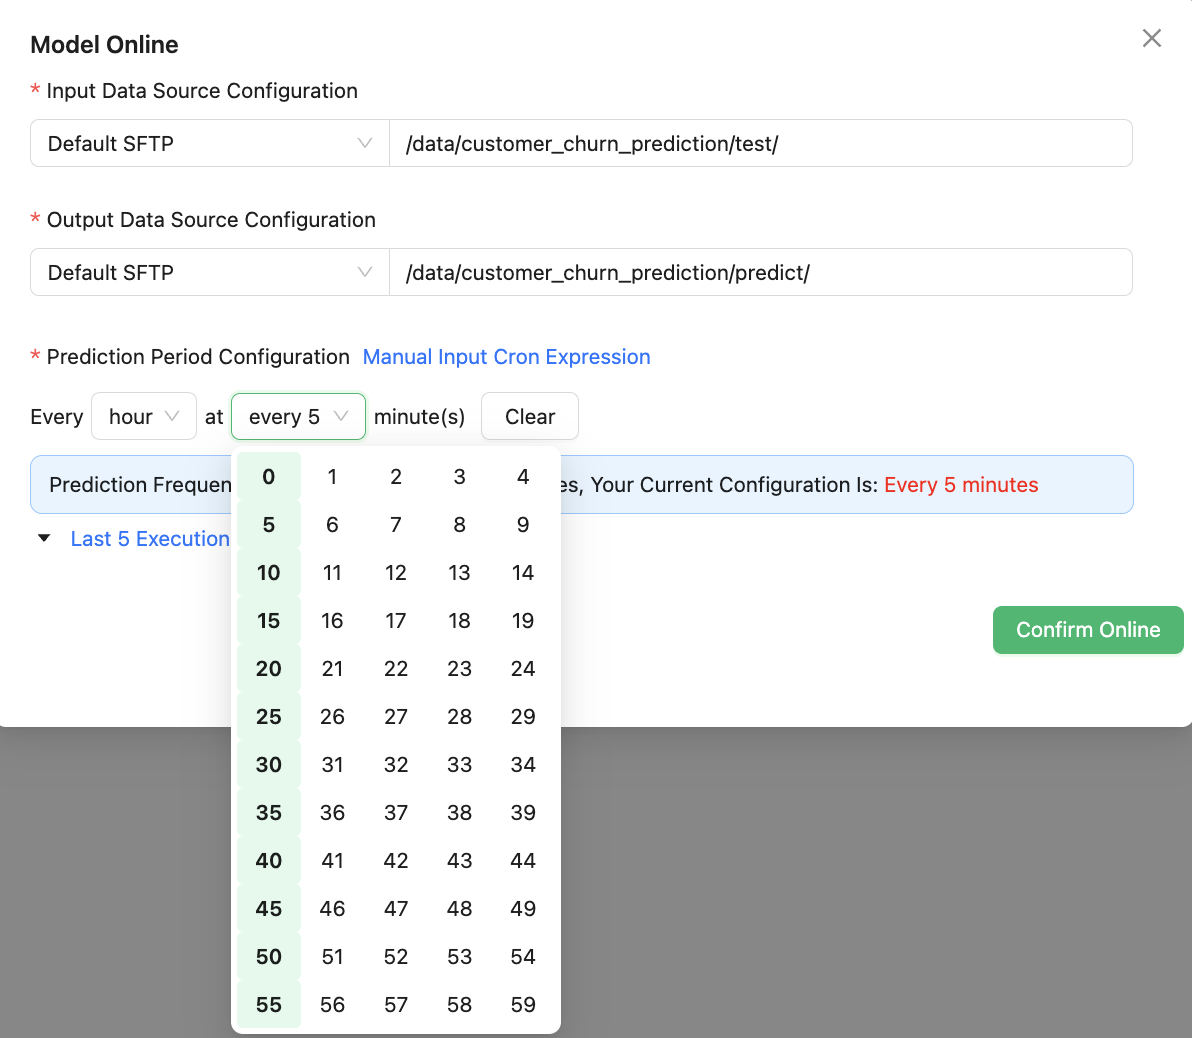
Prediction Period Configuration need to configure the run cycle of the model prediction task.
Prediction period Indicates the prediction frequency at which the system scans data directories on heterogeneous object storage (e.g. SFTP file servers) after the model is launched. In each scan, once some new files are detected, these new files will be used as the input of model prediction, and the corresponding result files will be output to the output data source after the prediction is completed.
The system provides the following two ways to configure the running cycle of the model prediction task.
Automatic selection mode as shown below:
As shown in the figure below, the manual selection mode requires the user to fill in a "Cron expression" that conforms to the rules.

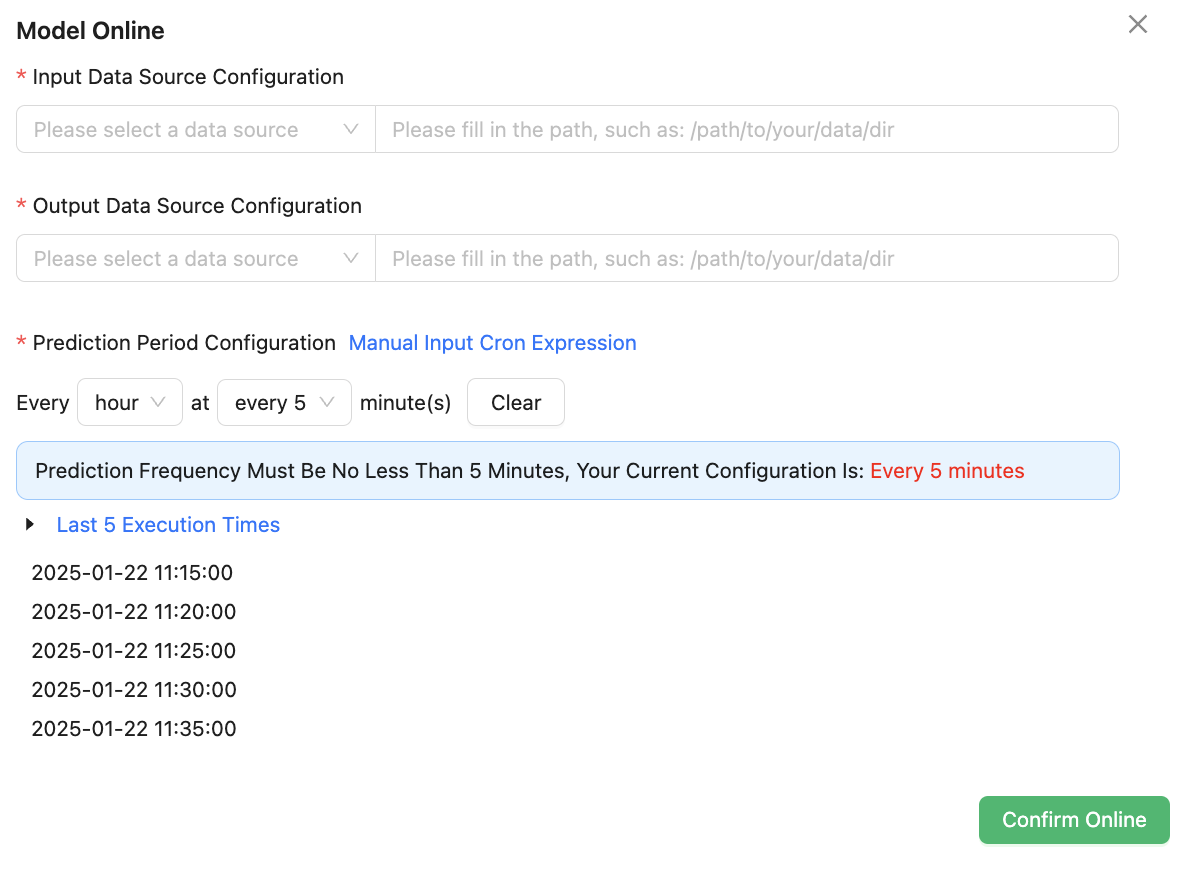
To ensure that the predicted period is correct, you are advised to click Last 5 Running Times to check whether the running time meets the expected requirements.
The following figure shows the last five running times when every 5 minutes is configured.
Step 3 : After filling in the model online configuration parameters, click Model Online. When the following picture appears, it indicates that the model is successfully online:

Step 4 : You can upload the data file to be predicted to the path corresponding to the Input Data Source Configuration in the configuration parameters of the model online through the connection tool. As shown in the picture below:

Offline
If it is necessary to stop the model prediction process, click Model Offline to complete the model offline, as shown in the following figure:

After confirming that the model is offline, the effect shown in the following figure indicates that the model is offline successfully.

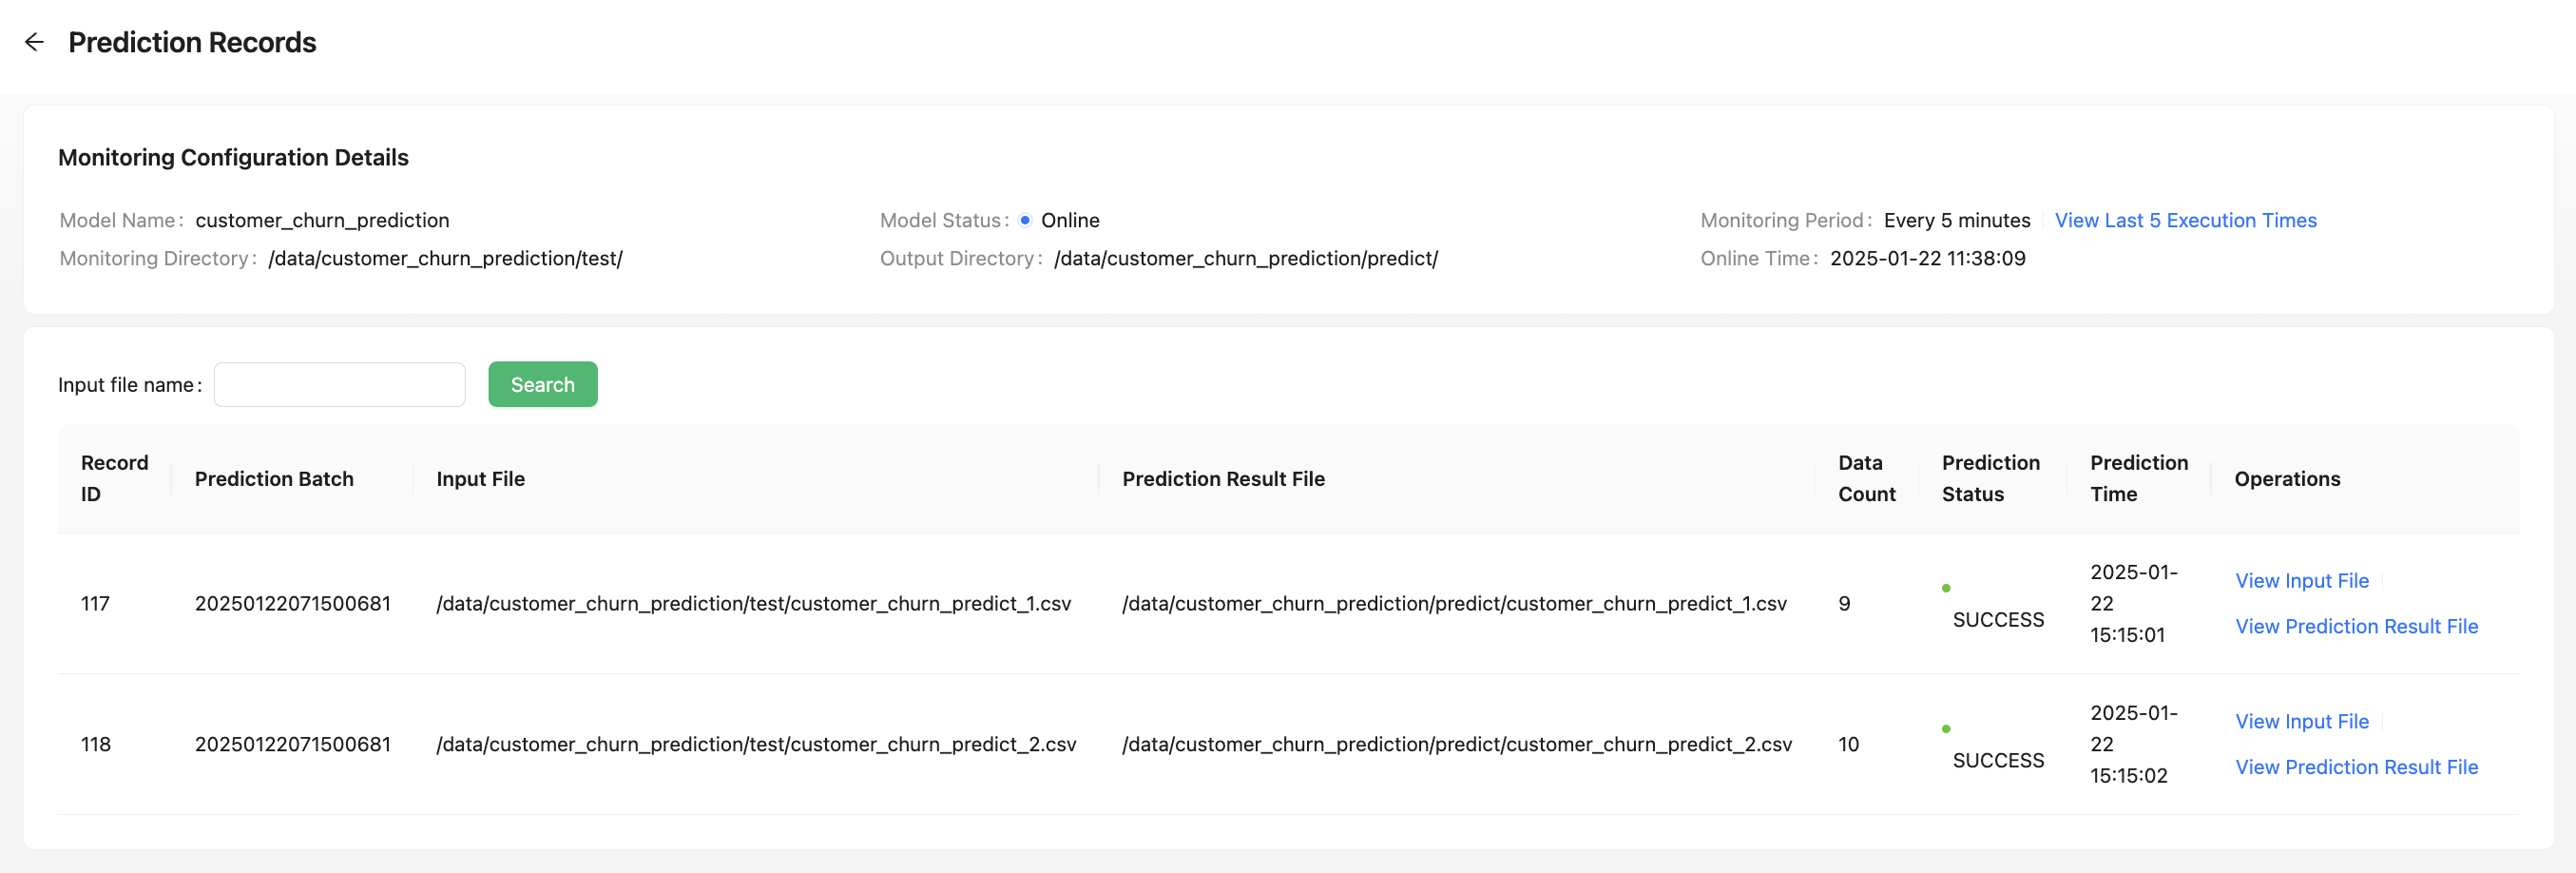
Prediction Record
After the model is launched, the system provides a prediction record view function to provide more detailed information about each prediction, and supports preview and download of the initial data and the forecast result data.
Step 1 : Select the model you want to view, and click Prediction Records, as shown below:

Step 2 : View prediction records.
The prediction records page mainly contains two parts: Monitoring Configuration Details and Prediction Records List.
(1)monitoring configuration details:Saves the parameter information filled in in the Model Online step.
(2)prediction records list:Displays the result information for each prediction file predicted under each batch, such as prediction batch, prediction status, prediction time.
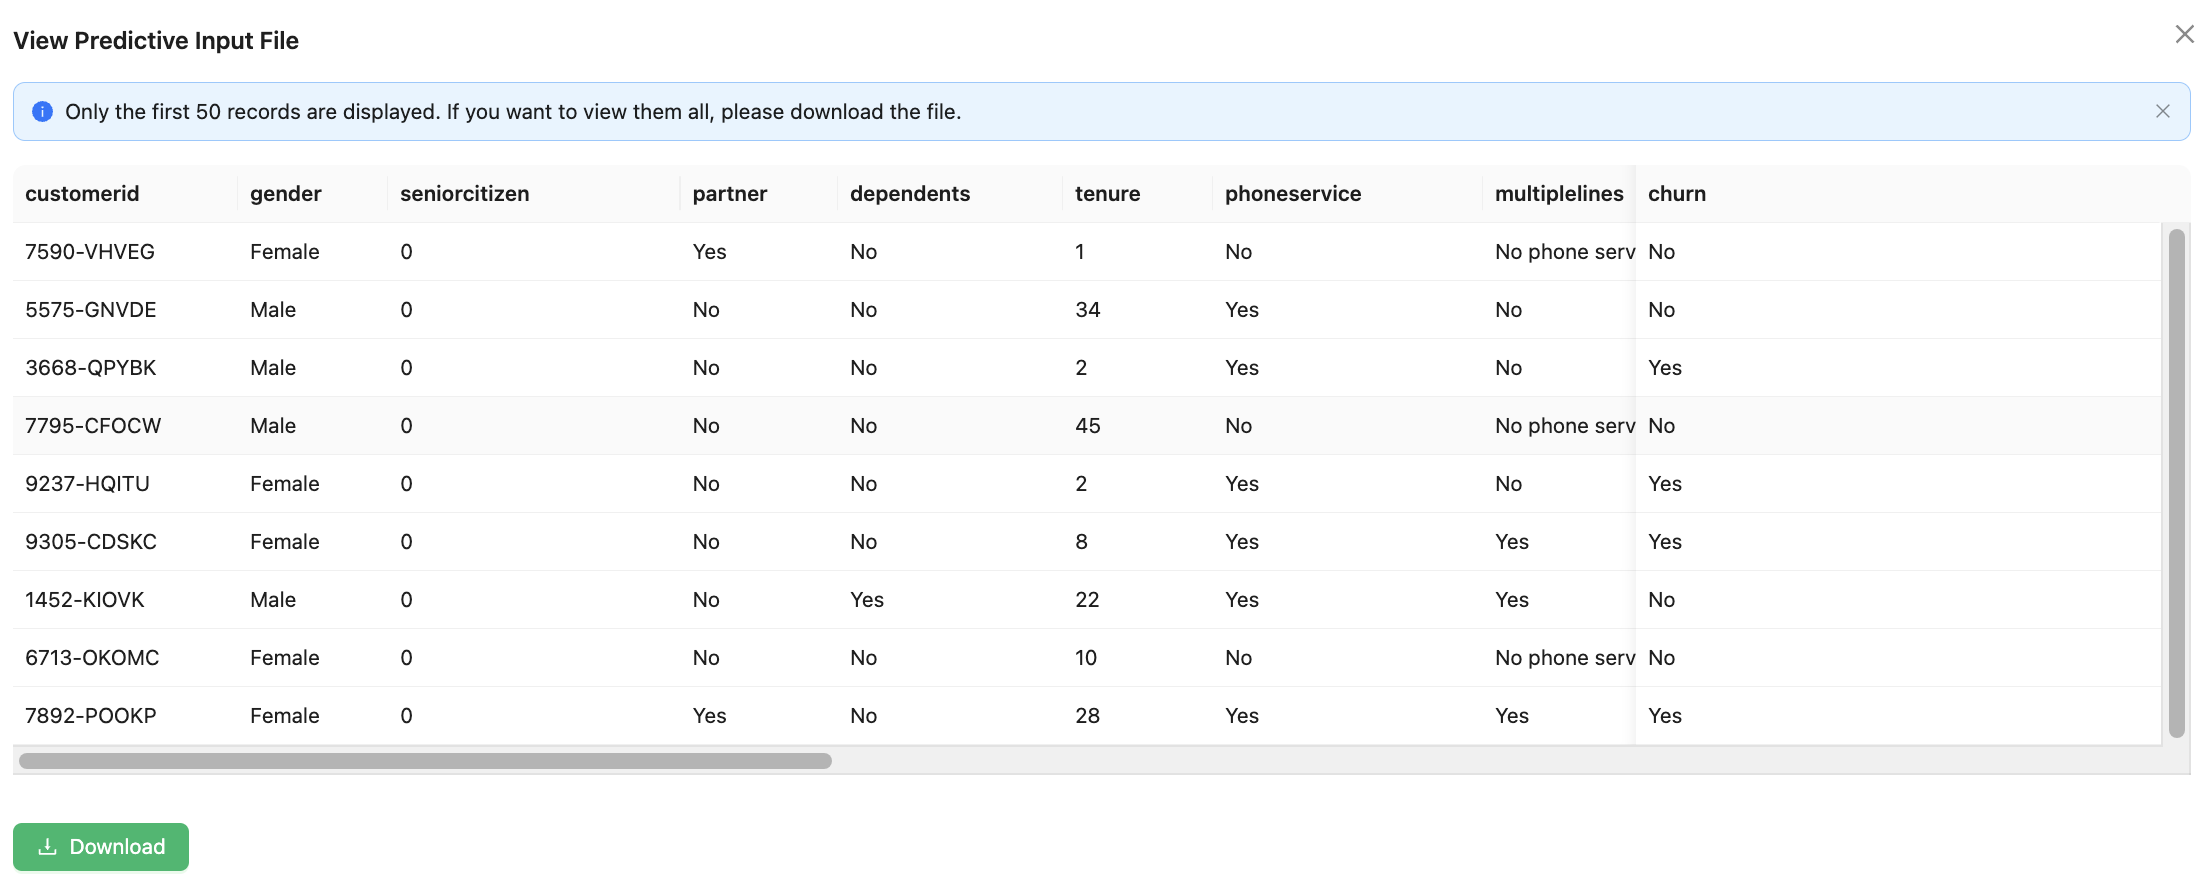
Step 3 : Click View Input File to view the input file of a prediction record, as shown below:
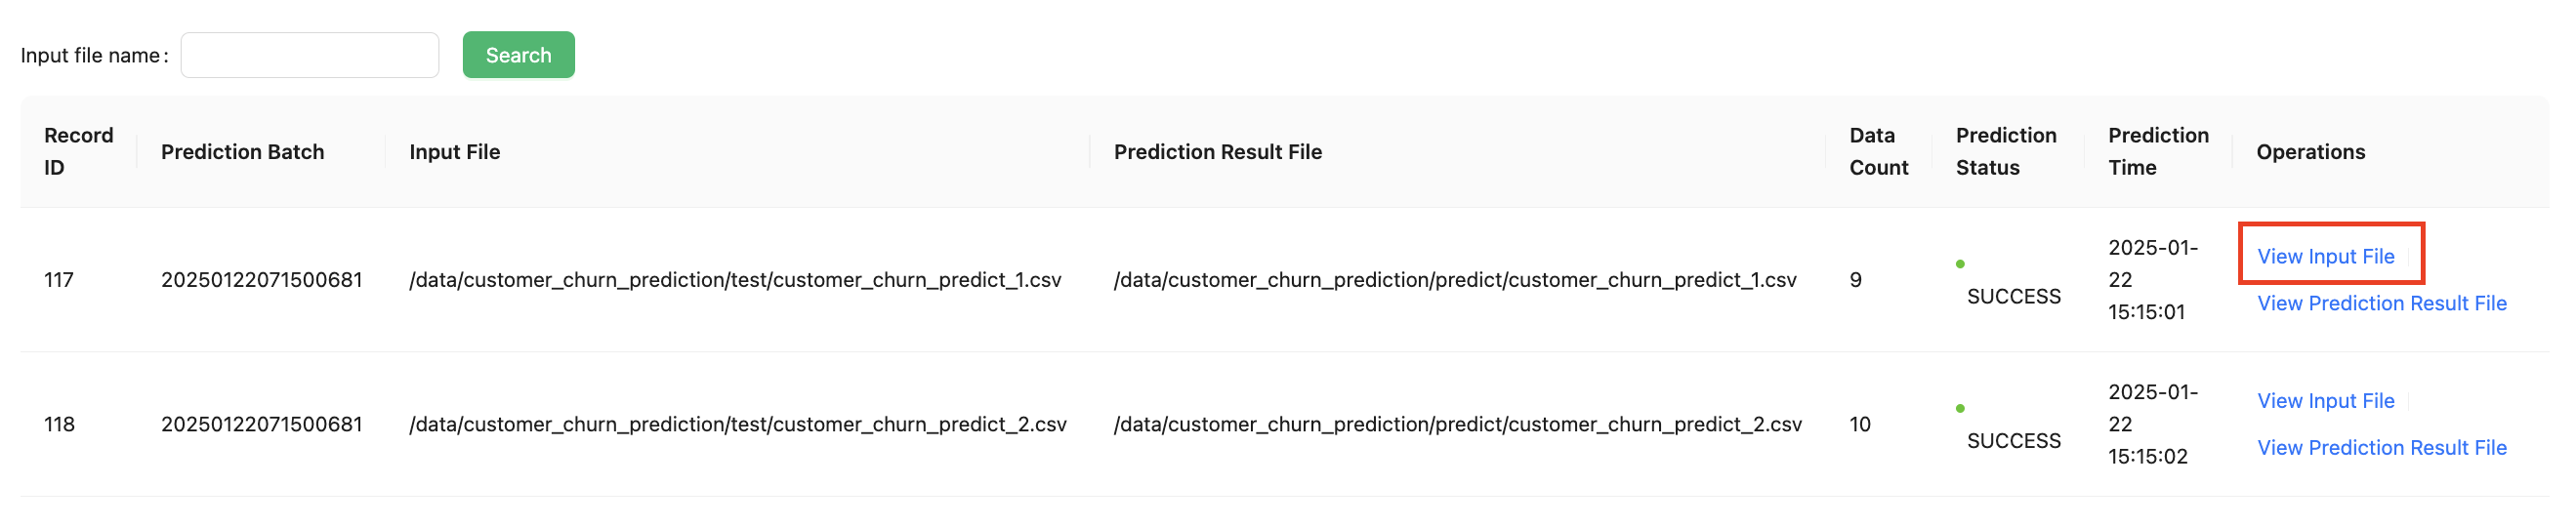
View Input File only the first 50 data can be previewed online, to view all of them please click Download button.
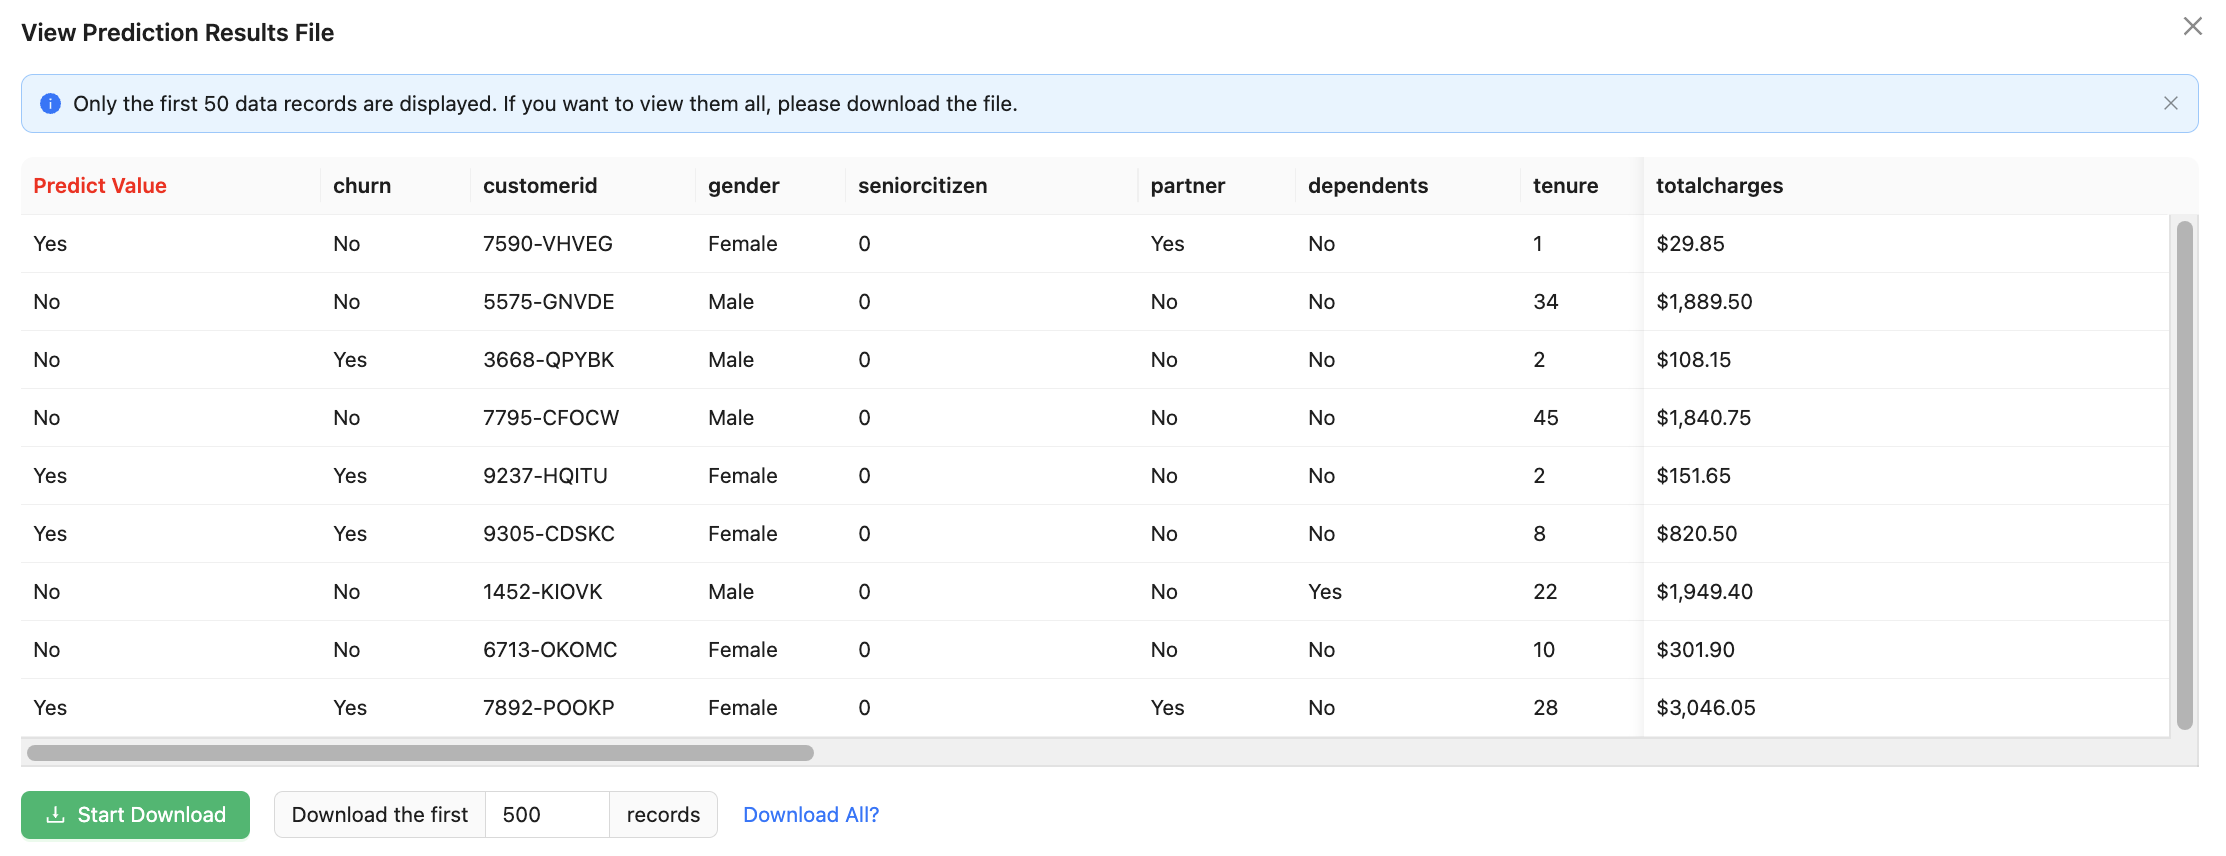
Step 4 : Click View Prediction Result File to view the output file of a certain forecast record, as shown below:

View Prediction Result File only the first 50 data can be previewed online, to download this file please click Download button. By default, download the first 500 pieces of data. If you download all of them, click Download All.
DataSource Management
DataSource Management Mainly used to maintain and configure the data source expected by users, usually applicable to users have their own heterogeneous object storage or services. Currently, only FTP and SFTP services based on file services are supported.
Create DataSource
Select any model that has been successfully run, and click Prediction, DataSource configuration, as shown in the following figure:

Click Add Data Source to add data source, as shown below:

Enter related parameters of the new data source and click Test connection. If "Connection successful" is displayed, the connection is successful. Click Save to complete the data source creation. As shown in the picture below:

Connect to DataSource
Select the data source in the data source list and click Test connection to test whether the current data source can be connected. As shown in the picture below:

Delete DataSource
Select the data source in the data source list and click the Delete button to delete the current data source. As shown in the picture below:

Built-in DataSource
The system provides a default built-in SFTP data source for you to use. Administrators can select Hide data source to make the default built-in data source invisible to ordinary users.
